How to Create a PIN in Windows 11
You have multiple sign-in options with Windows 11's Windows Hello feature, including security key, PIN, iris scan, facial recognition, and fingerprint recognition. PIN sign-in is usually favored over traditional password logins since it is easy to remember and isn't dependant on any specific technology.
When you first boot up Windows 11, it asks you to set up a PIN by default. You can add it later from the Settings app if you omit this step. So,If you missed the opportunity to set up a PIN during your initial Windows 11 setup, don't worry – this comprehensive guide will walk you through the process of adding one later through the Settings app.
The Advantages of Windows Hello PIN for Users Compared to Passwords
1. The Windows Hello PIN is specific to the device it is created on, making it more secure than passwords that might be reused across multiple platforms.
2. Unlike biometric authentication methods (fingerprint, facial recognition) that rely on specific hardware, the PIN is hardware-independent, ensuring consistent security across a variety of devices.
3. A PIN is typically shorter and easier to remember than complex passwords, reducing the likelihood of forgetting or needing to write down login credentials.
4.Using a PIN streamlines the sign-in process, providing a faster and more efficient way to access your Windows 11 device.
In summary, Windows Hello PIN offers a balance of security and convenience, making it a preferred authentication method for many Windows 11 users. It addresses common issues associated with passwords while providing additional security features for a more robust user authentication experience.
How to Set Up or Create a Pin in Windows 11
Step 1 Accessing Settings
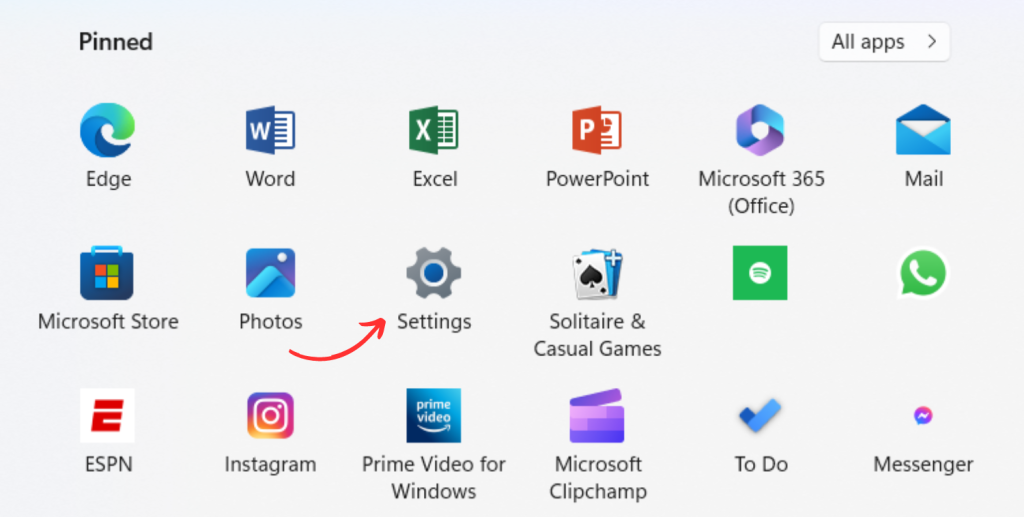
Begin by clicking on the "Windows" button or simply type settings in the search box of your Desktop screen. From the menu that appears, select "Settings" represented by the gear-shaped icon. This will open the Windows 11 Settings.

Step 2: Navigating to Accounts
Within the Settings menu, look for the "Accounts" option. Click on it to access account-related settings.

Step 3: Choosing Sign-in options
In the Accounts menu, select "Sign-in options." Here, you'll find various sign-in and security settings. If you are not able to see scroll down.
Step 5: Verifying Your Account
Windows 11 will prompt you to verify your account by entering your current password. This is an essential security step to ensure that only authorized users can create or modify PIN settings.

Step 6: Creating Your PIN
Step 6
Once your account is verified, you can proceed to create your PIN. Enter the desired numeric code in the provided field. It's recommended to choose a PIN that is easy for you to remember but difficult for others to guess.

Step 7: Confirming Your PIN
After entering your chosen PIN, you'll be asked to confirm it by entering the same code again. This step helps prevent any mistakes and ensures that you remember the PIN correctly. If you already have a pin than you have to enter that pin and after that you can create a new Pin

